The project notebook
Freestanding restaurant booths: make the finished back part of the plan
A booth used as a room divider has more than a dining face. Its back, ends, base, and relationship with the surrounding routes become visible parts of the room. Selecting it from a photograph taken against a wall can leave those parts of the purchase unresolved.
Freestanding placement also does not automatically mean a booth is loose furniture that can be moved whenever the room changes. The selected model may have specific placement or attachment requirements. Treat appearance, installation, and circulation as separate questions before choosing a divider arrangement.
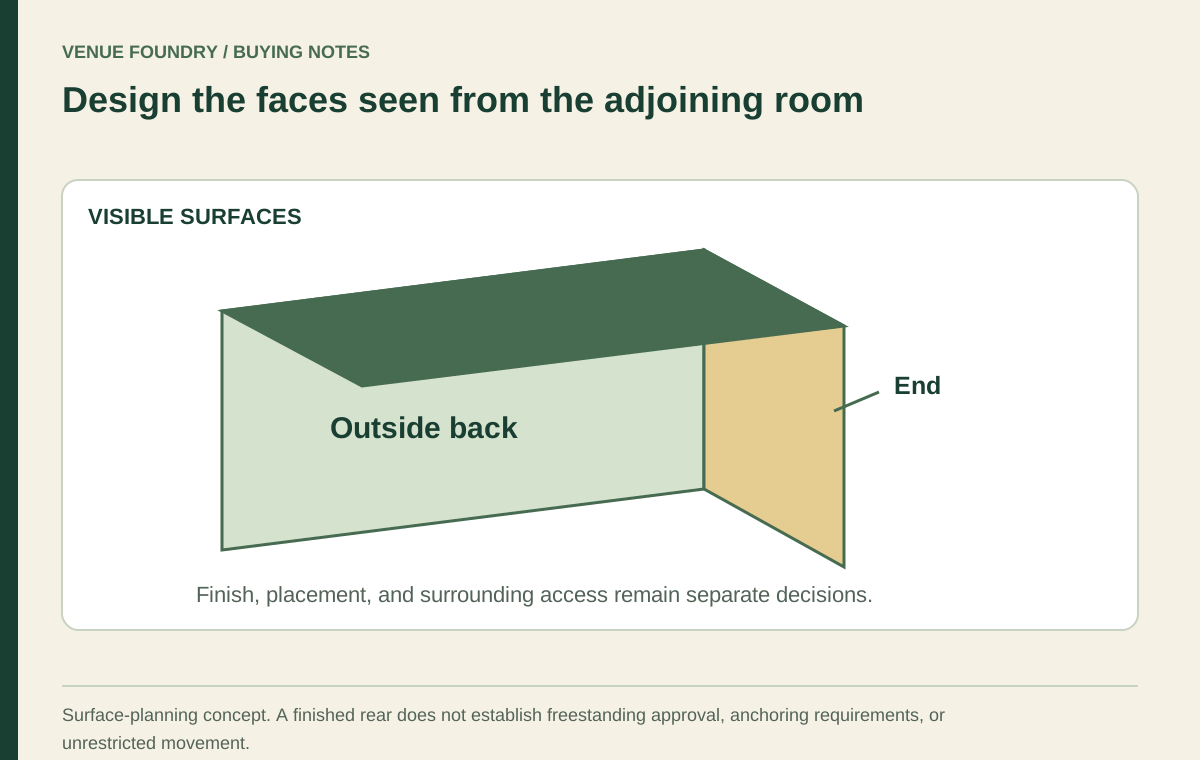
Open diagram at full size (new tab) ↗
Identify which surfaces the room will expose
Draw the booth in its intended location and mark every visible face. The inside back and seat face the dining table. The outside back faces the adjoining area. One or both ends may face a route or the room entrance. Each surface needs a supplied finish appropriate to that role.
The booth catalog presents many front views, but a front view cannot settle the outside-back question. Request the relevant rear image or drawing for the selected version. A booth that looks complete from the dining side may have a different treatment on its other faces.
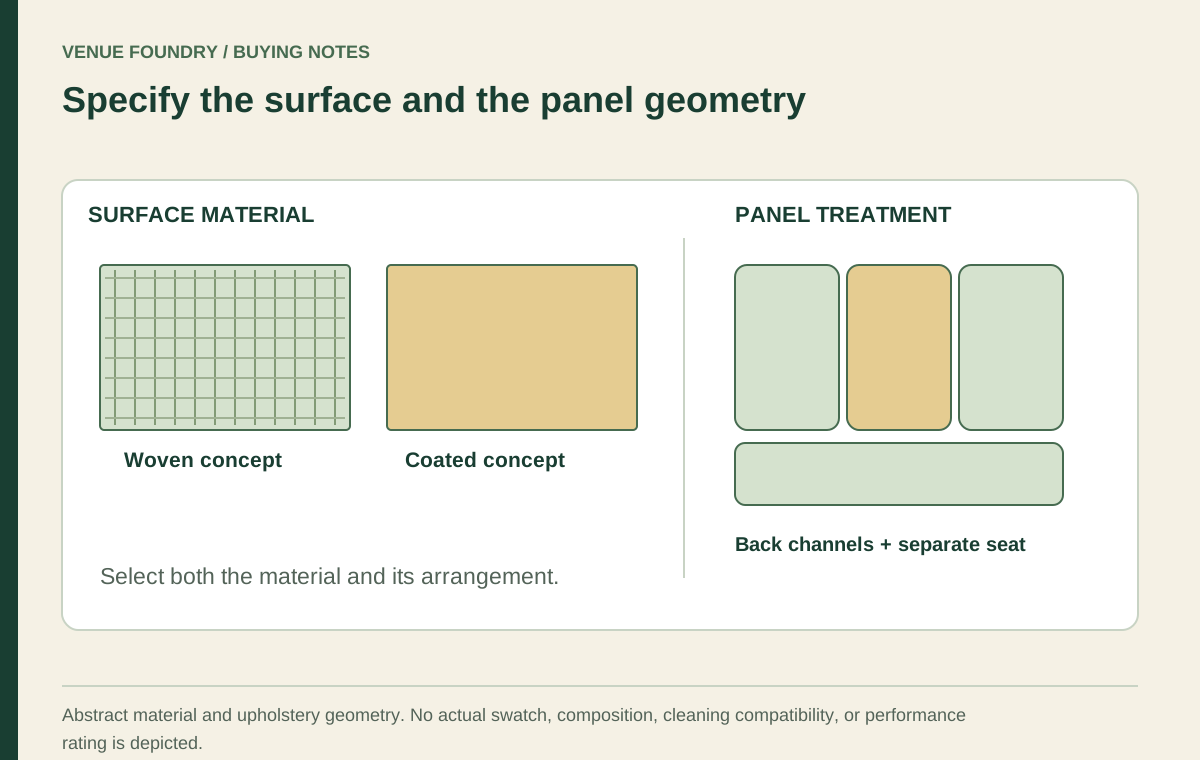
Think about the rear as a piece of the room's material palette. A laminate outside back can relate to nearby casework, while an upholstered rear creates a different visual surface. Neither is inherently more suitable; the choice depends on the intended appearance and the model's offered construction.
Use manufacturer examples to separate finish from placement
Shelby Williams provides a useful example in its DN range: specified single and deuce-single models include an upholstered outside back. Its BZ range separately lists a laminate outside-back option. These are range-specific details that demonstrate why the rear finish should be identified explicitly.
Those examples are not specifications for the products in this catalog. They also do not establish that every booth with a finished rear can be placed anywhere. In the same manufacturer's guidance, freestanding single booths or wall benches have a floor-anchoring requirement. The finish and placement requirements are separate parts of the product information.
For a current catalog shortlist, the October 17, 2026 FRU-BT-CE record listed wood legs and separate seat and back upholstery options. Those fields describe useful selections, but they do not by themselves establish the outside-back finish or an installation method. Resolve those details for the actual proposed placement.
Decide whether the divider serves one side or two
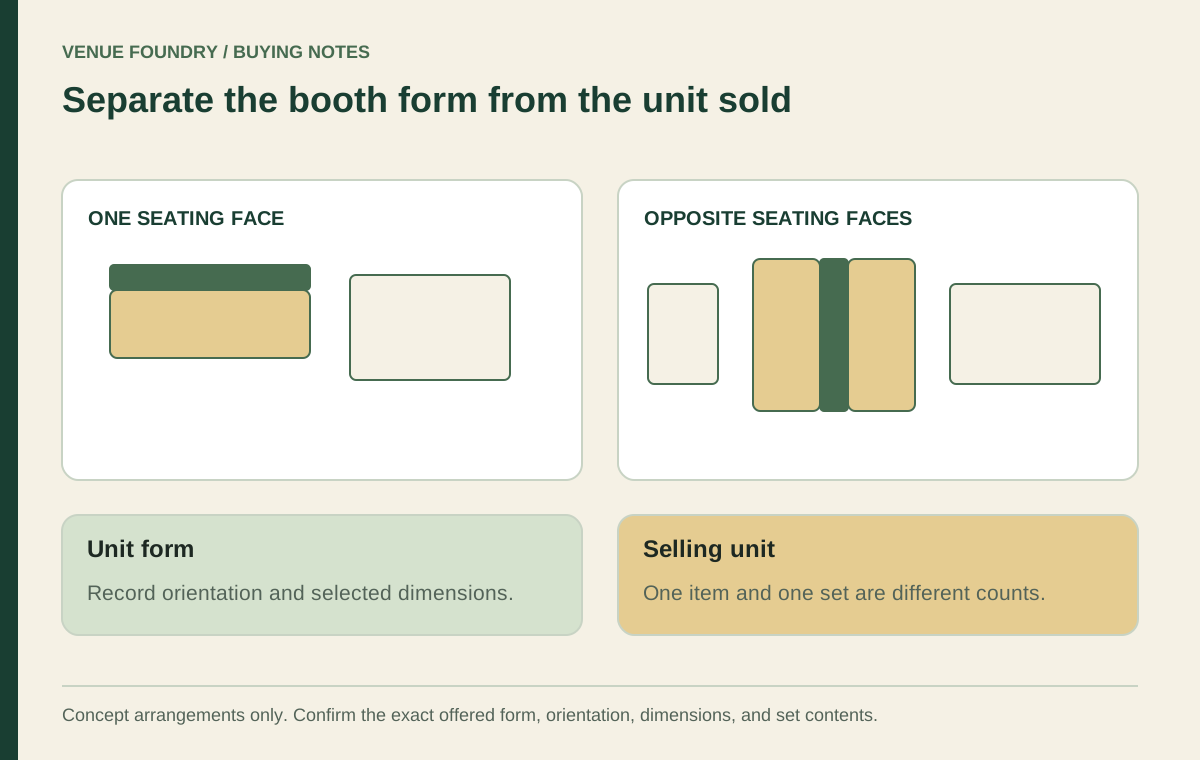
A single-facing booth can provide seating on one side and a visual boundary on the other. A double-facing unit can serve tables on opposite sides. The two arrangements create different relationships with the room and should not be treated as interchangeable divider shapes.
The dated FRU-BT-12C listing offered Single and Double forms among its shape controls. Choosing the form changes the furniture arrangement that must be reviewed. It does not establish that the same overall footprint or table layout applies to both selections.
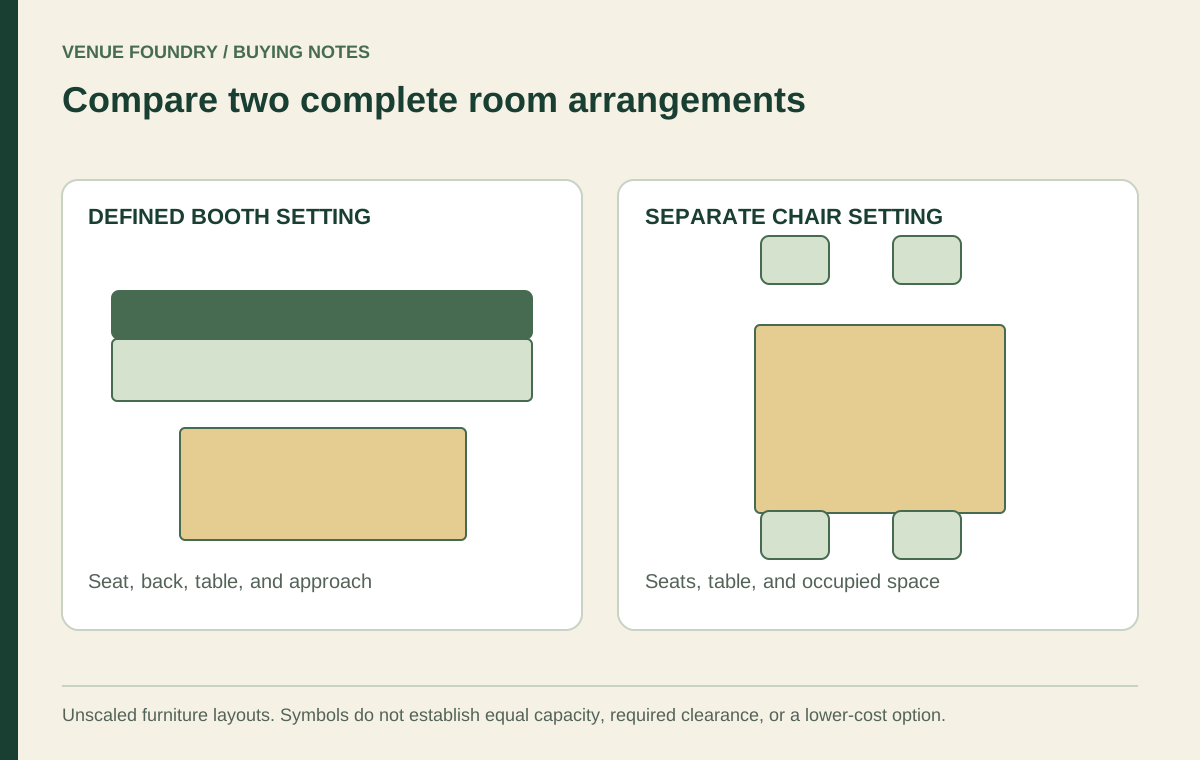
For a two-sided arrangement, draw both tables and both service approaches. The central booth is only one component of the complete setting. A visually tidy row can conceal unequal access on opposite sides if the adjacent room boundaries differ.
Treat the ends as transitions between areas
The end of a divider is where a person moves from one side to the other. Its position can influence how clearly the route is understood and how people approach the table. A projecting end panel or decorative detail also occupies part of that transition.
Read the room-planning guide, then show the full end geometry on the actual layout, including any adjacent chair, table corner, or service object. Do not leave a route as an unmeasured blank strip between two large furniture shapes. The relevant access and occupancy requirements need review for the actual site.
A rounded-looking end in a photograph should not be assumed to reduce every conflict. The occupied seating position and table outline still matter. The booth fit review helps connect the divider's placement with the guest's actual entry and exit.
Coordinate the height with the purpose of the division
A lower back can mark a change of area while leaving more of the room visible above it. A higher back can interrupt additional sightlines. The effect depends on where people sit and stand, not merely on the height label in isolation.
Use the high-back discussion to compare those views. A divider intended to define a quiet-looking corner should still be reviewed from the entrance and service route. Visual enclosure should not be described as acoustic isolation without appropriate evidence.
The rear finish and height work together. A large uninterrupted rear panel can become a dominant visual element, especially when several units repeat. Compare the full run with the adjacent walls and floor using actual selected surface references. Read the materials guide before treating their screen appearance as a physical match.
Keep building connections out of an informal furniture move
Placement requirements may involve floor attachment, service access, or integrated power. Those conditions can limit whether the booth is repositioned later. Establish the accepted arrangement before describing the divider as flexible furniture in the operating plan.
If the product requires anchoring, the method belongs to the manufacturer's instructions and the qualified installation scope. This article does not supply fastener choices, floor details, or permission to modify the furniture. The buying decision should identify the requirement and its cost responsibility.
Likewise, a power option can connect the booth to a particular building location. Moving the furniture may affect that connection even when the visible seating arrangement still fits. The furniture layout and service planning should therefore be coordinated before the final selection enters the order.
Compare the finished divider as a complete purchase
In the budget planner, include the chosen form, height, visible finishes, tables, and seating quantities. Keep any installation or building work separately identified until its scope is established. The visible booth price does not necessarily include every task needed for the proposed location.
Review these points before approving the divider:
- Every exposed face has an identified supplied finish.
- The chosen form serves the intended side or sides.
- The ends and adjacent occupied positions are shown.
- The height creates the intended views through the room.
- Placement and service requirements are known for the actual model.
Make the back as deliberate as the front
A freestanding booth succeeds when it works from every direction in which the room uses it. The dining face, outside back, ends, and surrounding approaches should form one coherent arrangement. That requires more information than a pleasing front photograph and a nominal seat count.
Use contact for the missing rear-view or placement details, then review the accepted configuration through how to order. Keep those details with the project. The resulting divider should be a fully specified part of the room, with its appearance and practical requirements equally clear.