The project notebook
Restaurant patio partitions: define the boundary without losing the service route
A patio partition can define the edge of a dining area, create a visual rhythm, or give a logo a place in the streetscape. Its usefulness depends on the complete arrangement: panels, supports, corners, openings, and the furniture beside it. A decorative panel alone is not the whole boundary.
Plan the boundary together with the service route. The partition should help people understand where the dining area begins without creating an unresolved obstacle at its entrance or along its edge. Appearance, support requirements, and site permissions remain separate questions that need their own information.
Open diagram at full size (new tab) ↗
Decide what the partition is meant to do
Start with the intended role. Marking the dining area visually is different from screening a view, guiding arrivals, or satisfying a site-specific requirement. The selected product should be judged against the role it can actually support.
Do not treat a decorative patio partition as a guardrail, security barrier, or engineered wind screen without appropriate product evidence and site approval. A panel's substantial appearance does not establish those functions.
If the boundary relates to a public sidewalk, a leased area, or a regulated outdoor dining space, have the applicable requirements reviewed for the location. The furniture plan should work within that accepted area. This article does not determine the permitted footprint or substitute for the relevant local review.
Separate panels from the stands that support them
The October 17, 2026 FRU-SPCH-PAR-CIR record listed a circle-pattern panel with 3-, 5-, and 7-foot size choices, Black or Grey colors, and a logo option. Its stated panel height was 29.50 inches. Those fields describe a selectable panel, not the complete assembled boundary.
Separate records identify support components. FRU-SPCH-ST-END, for example, was an end stand with stated dimensions of 36 inches high by 10 inches long by 10 inches wide. Its listed weight was 13 pounds. These dimensions should not be confused with the panel's height or an assembled system's overall length.
Identify the accepted combination and required component quantities for the actual run. Do not assume that every panel includes stands or that the same stand arrangement applies at an end, a straight junction, and a corner.
Draw the complete footprint at the floor
A panel may appear thin in elevation, but its supports occupy floor space. Show the full stand or base outline on the actual patio drawing, along with the neighboring table and occupied chair positions. Consult the planning guide for the wider furniture review. The floor footprint is the relevant shape for the route review.
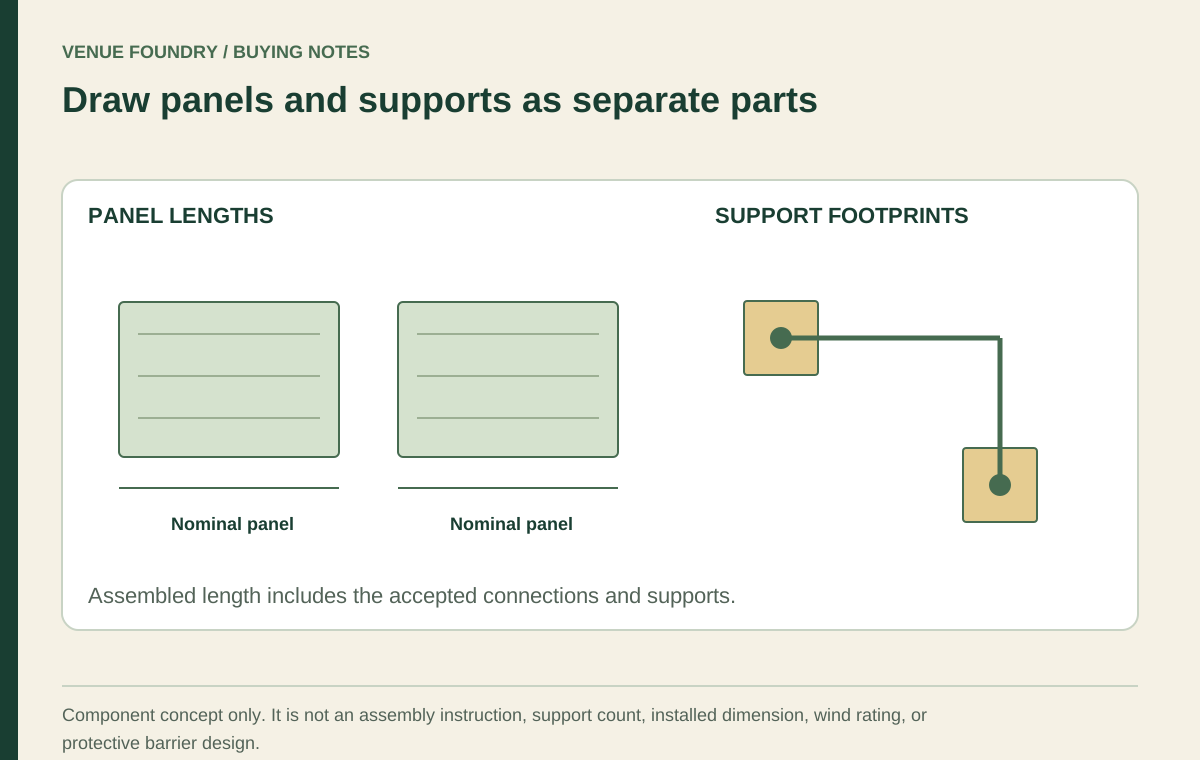
The panel's selected length is not necessarily the total length of the assembled run. Supports, connections, and end conditions can add to or otherwise affect the overall arrangement. Use the product's accepted assembly information rather than adding panel labels and treating the sum as a fabrication dimension.
A hypothetical example makes the distinction clear. Two nominal 5-foot panels provide 10 feet of labeled panel length. That arithmetic does not establish the outside-to-outside length of the completed system. The connection and support geometry still need to be included.
Treat corners and openings as deliberate components
An L-shaped boundary needs a defined corner, while an entrance needs an intentional opening. Those are different conditions from a straight run. The product information should identify which components serve each role and how the accepted arrangement is assembled.
The dated FRU-SPCH-ST-CNR record identified a corner stand as a separate item. That is evidence that the corner deserves its own line in the selection. It does not establish a universal connection method or every angle the system can accommodate.
Review the opening from the guest's approach and from the server's route. A visually centered entrance may not be the most practical location if it directs people into an occupied table position. The small-patio layout article keeps those movements connected to the furniture arrangement.
Balance screening with visibility
A patterned panel can preserve some visual connection through the boundary. A more solid treatment can create a stronger separation. The effect depends on the pattern, height, viewing angle, and what sits behind it, rather than on the word partition alone.
Compare the selected pattern beside the furniture palette. A repeated circle, hexagon, or square motif can become a noticeable part of the restaurant's exterior identity. The FRU-SPCH-PAR-HEX listing provides a separate patterned option with its own selectable size and logo controls.
If branding is included, review the actual artwork scope and acceptance process. A logo option does not establish that every color, size, or application method is available. Keep the approved visual treatment tied to the selected panel configuration.
Review planters and accessories as additional scope
A stand with a planter can change the appearance and operating needs of the boundary. The container, planting arrangement, and any associated care should be considered alongside the furniture. Do not assume that the empty product's weight describes its final installed condition.
The FRU-SPCH-ST-END-PL record described an end stand with a planter and listed a different weight from the plain end stand. That is a component distinction to preserve in the schedule. It does not provide an approved ballast quantity, planting specification, or wind rating.
The wind-planning discussion explains why weight and exposure instructions are separate. Use the accepted product guidance for the complete boundary, especially if planters or other additions are proposed.
Price the actual run rather than one attractive panel
In the budget planner, include every selected panel, required stand, corner component, and accepted accessory. Keep installation or site-work questions outside the product subtotal until their scope is established. A panel price alone does not describe the cost of the finished edge.
Review the complete selection against these questions:
- What role is the boundary intended to serve?
- Which panels and supports make up the accepted system?
- What is the full assembled floor footprint?
- Where are the entrance and service transitions?
- Which exposure, artwork, and site requirements remain unresolved?
Give the patio an edge that works from both sides
A useful partition makes the dining area legible while respecting the movements around it. Its pattern and branding should be as deliberate as its supports and openings. The whole boundary deserves review, including the floor space occupied by the less visible components.
Use contact for missing assembly or configuration information before finalizing the run. Keep the accepted layout and component schedule together. That produces a clearer purchase and a more coherent patio than choosing a panel first and trying to solve its placement after delivery.